- Prerequisites
- Preparing CDP and AIA points
- Mapping a custom domain to Azure Blog Storage
- Disabling secure transfer required
- Testing Accessibility of Storage Account
- Creating Domain Controller
- Configuring Network
- Installing Active Directory Domain Services and Adding a new Forest
- Creating Offline Root CA
- Installing Offline Root CA
- Post Installation Configuration on Root CA
- Configuration of CDP and AIA points
- Creating Issuing CA
- Configuring Network
- Creating CAPolicy in Issuing CA
- Publishing Root CA Certificates and CRLs in CA02
- Installing Issuing CA
- Configuration of Issuing CA
- Issue Encon Issuing CA Certificate
- Post Installation Configuration on Issuing CA
- Configuration of CDP and AIA points
- Configuring AIA points
- Configuring the CDP Points
- Uploading Certificates and CRLs to the Blob storage
- Script to copy Issuing CA CRLs
- Code Changes
- Troubleshooting
- Automating the script
- Conclusion
Deploying an Active Directory Certificate Services is a straightforward way for enterprises to build their PKI infrastructure. But it does have its shortcomings, such as
- Lack of deployment in multiple regions
- High latency on CDP and AIA points
To overcome this, organizations need to deploy region-specific PKI infrastructure, which can be harder to maintain and introduces complexity to the whole infrastructure.
But using Azure, organizations can deploy a PKI infrastructure that can be operated worldwide with low latency and high availability.
In this article, we will be showing you how your own PKI architecture on Azure.
Note: If this is your first time deploying a PKI, I recommend following ADCS Two Tier PKI Hierarchy Deployment as it is a more straightforward approach and also touches the basics.
Prerequisites
- An Azure account where we will create Virtual Machines and blob storage
- A custom domain name
- An offline Windows Server VM, which will be our Root CA
[NOTE: This is a test scenario. As such, CDP and AIA points may not match your requirements. Do use values that are appropriate as per your requirements.]
Preparing CDP and AIA points
We will create blob storage that will act as our CDP/AIA points for our PKI infrastructure. We will also associate it with our custom domain to redirect it to our blob.
Creating Azure Blob Storage
-
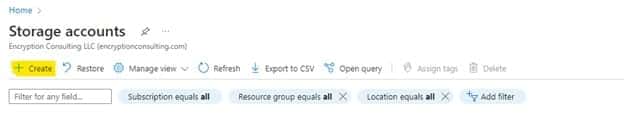
First, we would need to log into our Azure account and navigate to Storage Accounts

-
We will be creating a new storage account. So click Create on the top left corner.
-
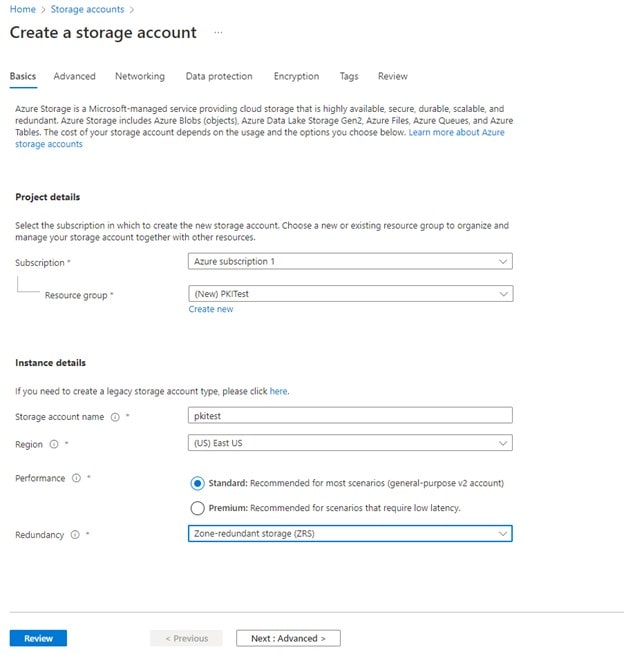
Provide the necessary details on the basics. For Redundancy, I would recommend at least Zone-redundant Storage (ZRS)
-
On the Advanced tab, leave everything on default and click next
-
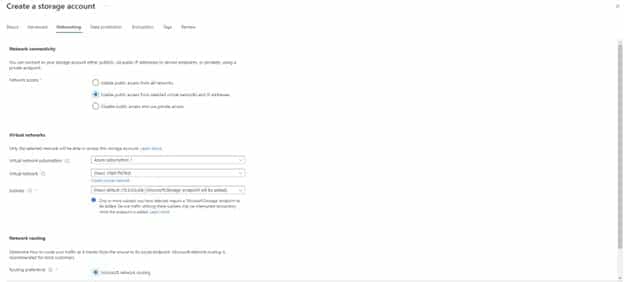
On the Networking tab, it is recommended to have public access from selected virtual networks and IP addresses and select the Virtual network where all the virtual machines will be deployed. If no virtual network exists, do create one.
- On the Data Protection tab, click Next.
- On the Encryption tab, leave everything default and click Next.
- Provide relevant tags and click Next.
- On the review tab, you can review everything looks good and click Create.
This will create the blob storage. Next, we will associate this blob storage with our custom domain and ensure it is accessible via HTTP.
Mapping a custom domain to Azure Blog Storage
For this step, you would need a custom domain. Once you log in, you can navigate to DNS settings
- In DNS settings, navigate to DNS records and enter a CNAME record.
-
Now we need to retrieve the hostname for your storage account. For this, we can navigate Settings > Endpoints on the left pane and copy the static website under Static Website. It should be something like https://pkitest.z13.web.core.windows.net (https://
.z13.web.core.windows.net/) Remove the https:// and additional /. It would look like pkitest.z13.web.core.windows.net, which is our hostname
-
Now in the DNS settings, for the hostname of the custom domain, provide pkitest and for the hostname, provide the hostname of the storage endpoint

Click to create a record
-
Navigate to Azure Storage account, click on Networking under Security + Networking and select Custom Domain on the tab above.
-
Provide the subdomain you created.
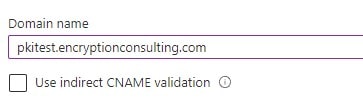
-
Click Save. After successful validation, you will get a validation notification
Disabling secure transfer required
For this blob being a CDP/AIA point, we need HTTP access to the blog, which is why we would need to turn off the secure transfer. If enabled, HTTP access would not be possible; our PKI wouldn’t be able to use this blob as CDP/AIA point.
-
Navigate to Configuration under Settings
-
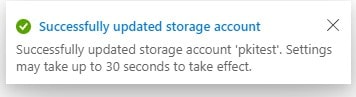
Set Secure Transfer Required to Disabled
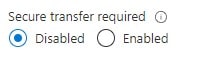
Click Save
Testing Accessibility of Storage Account
This section will ensure our storage account is accessible via a custom domain.
-
First, we would create a container and upload a file to it
-
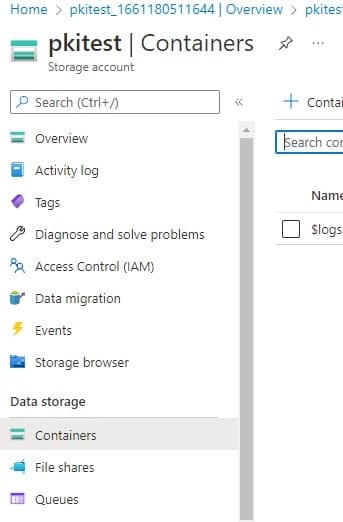
Navigate to Containers under Data Storage
On the top left corner, click
-
Provide the name, set public level access as a blob, and click Create
The container will be created

Click on the name and navigate inside it
On the top left corner, click
-
Select any file for testing (preferably a pdf or txt file)
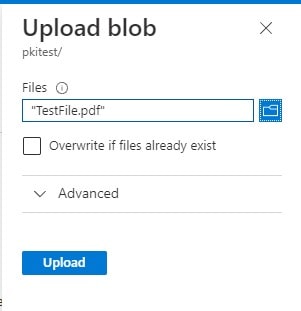
-
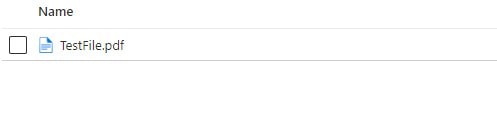
Click Upload, and once uploaded, it should be available in the container
-
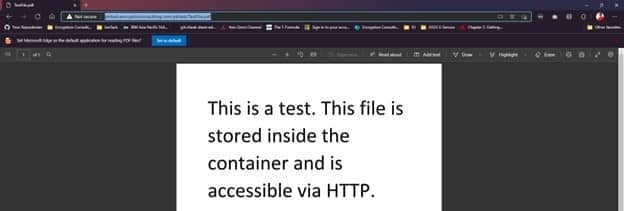
Now, we will try to access the file using a custom domain. The URL should be
http://<subdomain.customdomain>/<mycontainer>/<myblob>So for us, the domain should be
http://pkitest.encryptionconsulting.com/pkitest/TestFile.pdfEnsure the file is opened in HTTP and it does display the file or downloads it
This concludes our section on preparing CDP and AIA points. Next, we will begin creating our PKI. Now you may delete the test file from the container as it would only contain the cert and CRLs.
Creating Domain Controller
This Step-by-Step guide uses an Active Directory Domain Services (AD DS) forest named encon.com. DC01 functions as the domain controller.
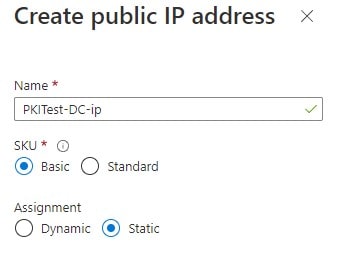
Firstly, we will deploy a VM on Azure. Ensure both the IPs are static.
While deploying, ensure,
- VMs are deployed on the same Virtual Network
- If deployed on the same region, ensure the subnet is the same
-
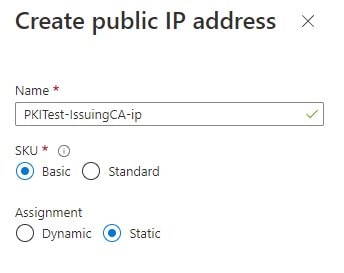
Public IP Address is static
-
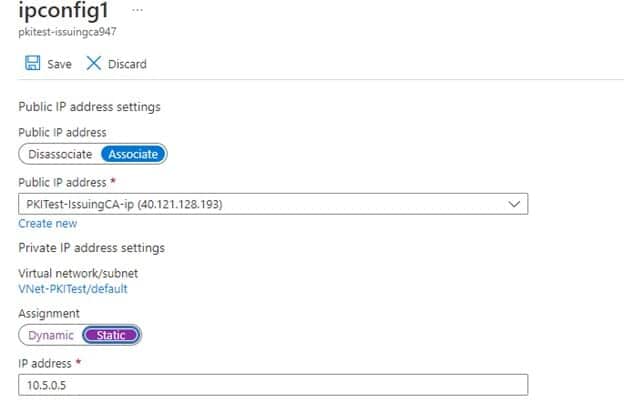
Once the VM is created, navigate to Networking under Settings and click on the Network Interface
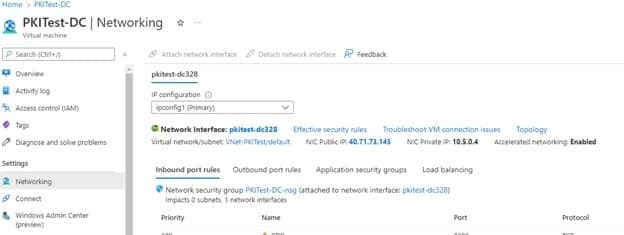
- Navigate to IP Configuration under settings
-
Click on ipconfig1 on the menu and change IP private settings to Static from Dynamic

- Click Save and go back to the VM
Provide other parameters as per your requirement and create the VM.
Configuring Network
Once the VM is created, log in and follow the steps below
- Login to DC01 as a local user
- Click Start, type ncpa.cpl , and press ENTER
- Click on Ethernet, and then click Properties under Activity
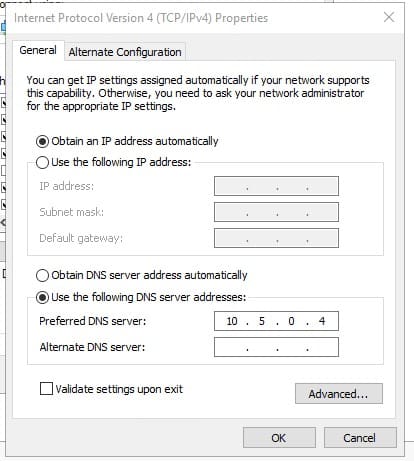
- Double Click on Internet Protocol Version 4 (IPv4)
- Only change the DNS Server Address, and provide the private IPv4 of DC01
-
For Alternate DNS, provide 8.8.8.8 or any other public DNS service you want.
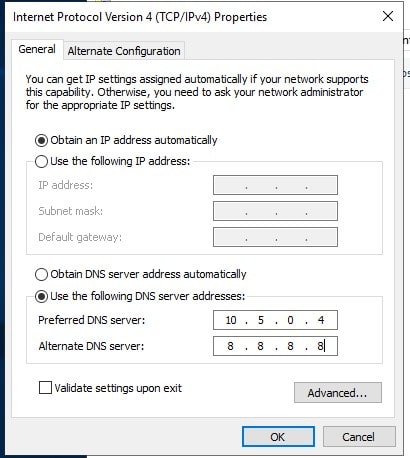
- Click OK and restart the VM from the Portal
- Once Restarted, log in to DC01 as a local user
- Click Start, type sysdm.cpl , and press ENTER
- Changer PC name to DC01, and Restart Now when prompted.
Installing Active Directory Domain Services and Adding a new Forest
- Open Server Manager. To do so, you can click the Server Manager icon in the toolbar or click Start, then click Server Manager.
- Click Manage, and then click Add Roles and Features
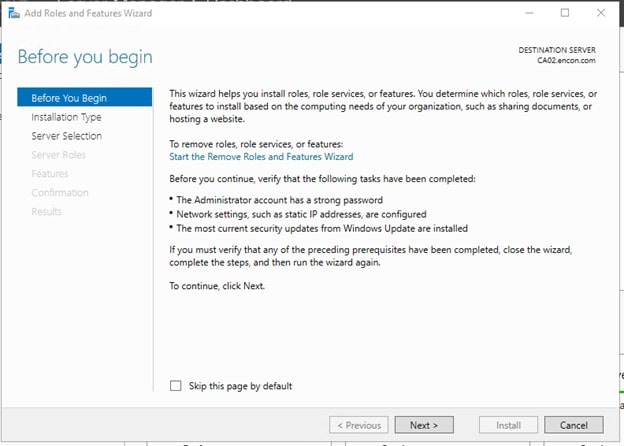
- Before you Begin, click Next
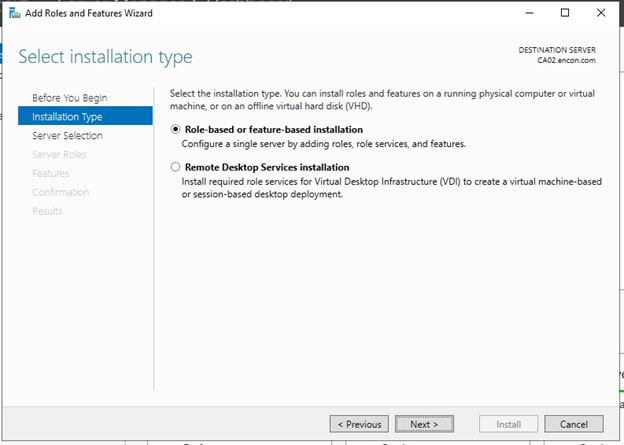
- On Installation Type, click Next
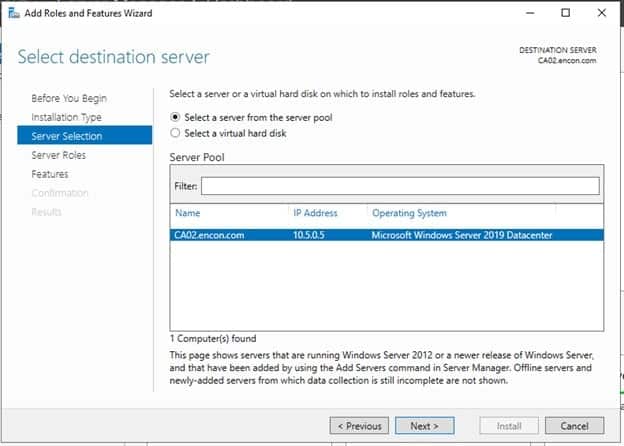
- On Server Selection, click Next
- On Server Roles, choose Active Directory Domain Services, click Add Features, and then click Next
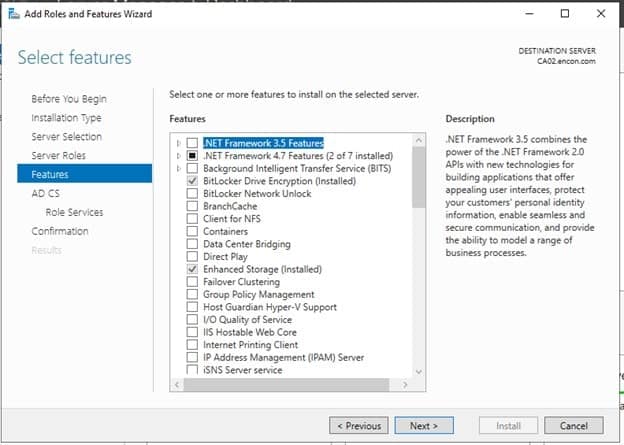
- On Features, click Next
- On AD DS, click Next
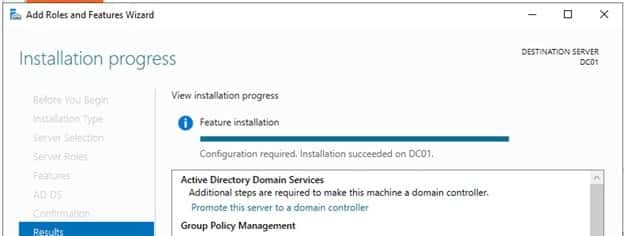
- On Confirmation, click Install.
-
After installation, either
-
Click on Promote this server to a domain controller on Add Roles and Features Wizard
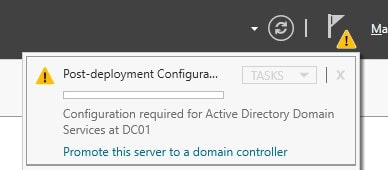
-
Or, click on Promote this server to a domain controller on Post Deployment Configurations in Notifications
-
-
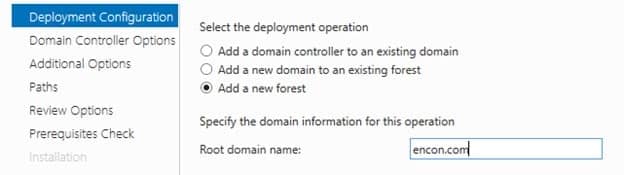
On Deployment Configuration, choose to Add a new forest and provide the root domain name (“encon.com”)
- On Domain Controller options, provide Directory Services Restore Mode password and click Next
- Under DNS options, click Next
- Under Additional options, click Next
- Under Paths, click Next
- Under Review options, click Next
- Under Prerequisites check, click Install
- Once installed, the remote connection would be terminated.
-
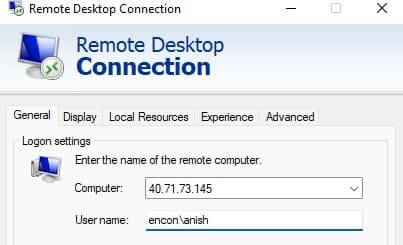
Login to DC01 as encon\
- DC01 is now ready
Creating Offline Root CA
The standalone offline root CA should not be installed in the domain. It should not even be connected to a network at all.
We will be creating this Root CA on-premises. I will create this on Proxmox, but you can use VMware or VirtualBox for this installation.
After installing Windows Server 2019, follow the steps below
- Log onto CA01 as CA01\Administrator.
- Click Start, click Run, and then type notepad C:\Windows\CAPolicy.inf and press ENTER.
- When prompted to create a new file, click Yes.
-
Type in the following as contents of the file.
[Version]
Signature="$Windows NT$"
[Certsrv_Server]
RenewalKeyLength=2048 ; recommended 4096
RenewalValidityPeriod=Years
RenewalValidityPeriodUnits=20
AlternateSignatureAlgorithm=0
- Click File and Save to save the CAPolicy.inf file under C:\Windows directory. Close Notepad
Installing Offline Root CA
- Log onto CA01 as CA01\Administrator.
- Click Start, and then click Server Manager.
- Click Manage, and then click Add Roles and Features
- On the Before You Begin page, click Next.
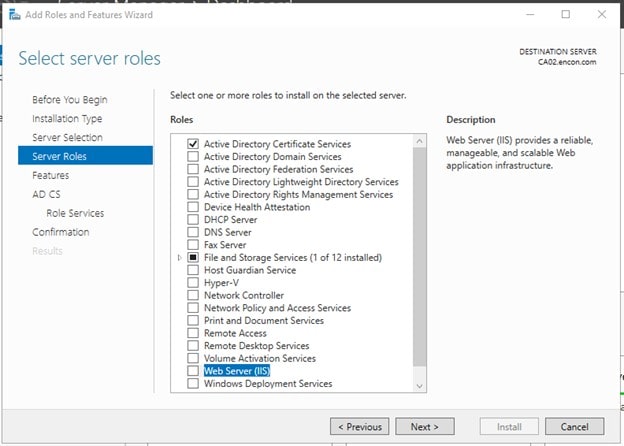
- On the Select Server Roles page, select Active Directory Certificate Services, and then click Next.
- On the Introduction to Active Directory Certificate Services page, click Next.
- On the Select Role Services page, ensure that Certification Authority is selected, then Next.
- On the Specify Setup Type page, ensure that Standalone is selected, and then click Next.
- On the Specify CA Type page, ensure that Root CA is selected, and then click Next.
- On the Set Up Private Key page, ensure that Create a new private key is selected, and then click Next.
- Leave the defaults on the Configure Cryptography for CA page, and click Next.
- On Configure CA Name page, under the Common name for this CA, clear the existing entry and type Encon Root CA. Click Next.
- On the Set Validity Period page, under Select validity period for the certificate generated for this CA, clear the existing entry and type 20. Leave the selection box set to Years. Click Next.
- Keep the default settings on the Configure Certificate Database page, and click Next.
- Review the settings on the Confirm Installation Selections page and then click Install.
- Review the information on the Installation Results page to verify that the installation is successful, and click Close.
Post Installation Configuration on Root CA
- Ensure that you are logged on to CA01 as CA01\Administrator.
- Open a command prompt. To do so, you can click Start, click Run, type cmd and then click OK.
-
To define the Active Directory Configuration Partition Distinguished Name, run the following command from an administrative command prompt
Certutil -setreg CA\DSConfigDN "CN=Configuration,DC=Encon,DC=com" -
To define CRL Period Units and CRL Period, run the following commands from an administrative command prompt:
Certutil -setreg CA\CRLPeriodUnits 52Certutil -setreg CA\CRLPeriod "Weeks"Certutil -setreg CA\CRLDeltaPeriodUnits 0
-
To define CRL Overlap Period Units and CRL Overlap Period, run the following commands from an administrative command prompt:
Certutil -setreg CA\CRLOverlapPeriodUnits 12Certutil -setreg CA\CRLOverlapPeriod "Hours"
-
To define Validity Period Units for all issued certificates by this CA, type the following command and then press Enter. In this lab, the Enterprise Issuing CA should receive a 20-year lifetime for its CA certificate. To configure this, run the following commands from an administrative command prompt:
Certutil -setreg CA\ValidityPeriodUnits 20Certutil -setreg CA\ValidityPeriod "Years"
Configuration of CDP and AIA points
Multiple methods are configuring the Authority Information Access (AIA) and certificate revocation list distribution point (CDP) locations. The AIA points to the public key for the certification authority (CA). You can use the user interface (in the Properties of the CA object), certutil, or directly edit the registry. The CDP is where the certificate revocation list is maintained, which allows client computers to determine if a certificate has been revoked. This lab will have three locations for the AIA and four locations for the CDP.
Configuring AIA points
A certutil command is a quick and common method for configuring the AIA. The certutil command to set the AIA modifies the registry, so ensure that you run the command from a command prompt run as administrator. When you run the following certutil command, you will be configuring a static file system location, a HTTP location for the AIA, and a lightweight directory access path (LDAP) location. Run the following command:
certutil -setreg CA\CACertPublicationURLs "1:C:\Windows\system32\CertSrv\CertEnroll\%1_%3%4.crt\n2:http://pkitest.encryptionconsulting.com/pkitest/%1_%3%4.crt\n2:ldap:///CN=%7,CN=AIA,CN=Public Key Services,CN=Services,%6%11"
Note: You need to modify the http address on the AIA location. For this scenario, our http container address was http://pkitest.encryptionconsulting.com/pkitest/, which can vary for you.
Configuring the CDP Points
The certutil command to set the CDP modifies the registry, so ensure that you run the command from a command
certutil -setreg CA\CRLPublicationURLs "1:C:\Windows\system32\CertSrv\CertEnroll\%3%8%9.crl\n2:http://pkitest.encryptionconsulting.com/pkitest/%3%8%9.crl \n10:ldap:///CN=%7%8,CN=%2,CN=CDP,CN=Public Key Services,CN=Services,%6%10"
Note: You need to modify the http address on the CDP location. For this scenario, our http container address was http://pkitest.encryptionconsulting.com/pkitest/, which can vary for you.
At an administrative command prompt, run the following commands to restart Active Directory Certificate Services and publish the CRL
net stop certsvc && net start certsvc
certutil -crl
Creating Issuing CA
Enterprise CAs must be joined to the domain. Before you install the Enterprise Issuing CA (CA02), you must first join the server to the domain. Then you can install the Certification Authority role service on the server.
Firstly, we will deploy a VM on Azure. Ensure both the IPs are static.
While deploying, ensure,
- VMs are deployed on the same Virtual Network
- If deployed on the same region, ensure the subnet is the same
-
Public IP Address is static
-
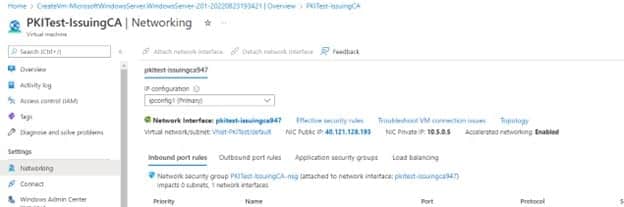
Once the VM is created, navigate to Networking under Settings and click on the Network Interface
- Navigate to IP Configuration under settings
-
Click on ipconfig1 on the menu and change IP private settings to Static from Dynamic
- Click Save and go back to the VM
- Login to CA02 as a local user
- Click Start, type ncpa.cpl, and press ENTER
- Click on Ethernet, and then click Properties under Activity
- Double Click on Internet Protocol Version 4 (IPv4)
-
Only change the DNS Server Address, and provide the private IPv4 of DC01 (if both belong to the same region), or provide the public IP address of DC01 (if they belong to different regions)
- Click OK and restart the VM from the Portal
- Once Restarted, log in to CA02 as a local user
- Click Start, type sysdm.cpl, and press ENTER
-
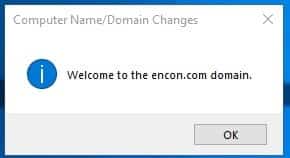
Changer PC name to CA02 and provide domain name in the domain. Provide credentials for DC01 and wait until you get a success message
- Click on Restart Now when prompted.
- Log onto CA01 as CA01\Administrator.
- Click Start, click Run, and then type notepad C:\Windows\CAPolicy.inf and press ENTER.
- When prompted to create a new file, click Yes.
-
Type in the following as contents of the file.
[Version]
Signature="$Windows NT$"
[PolicyStatementExtension]
Policies=InternalPolicy
[InternalPolicy]
OID= 1.2.3.4.1455.67.89.5
URL= http://pkitest.encryptionconsulting.com/pkitest/cps.txt
[Certsrv_Server]
RenewalKeyLength=2048
RenewalValidityPeriod=Years
RenewalValidityPeriodUnits=10
LoadDefaultTemplates=0
- Click File and Save to save the CAPolicy.inf file under C:\Windows directory. Close Notepad
- Log into CA01 as a local administrator
- Navigate to C:\Windows\System32\CertSrv\CertEnroll
-
Copy the CRLs and Certificates present
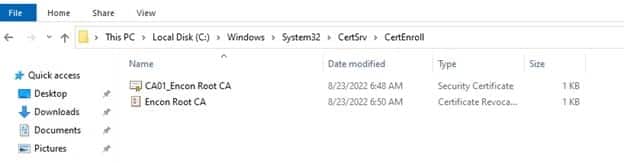
-
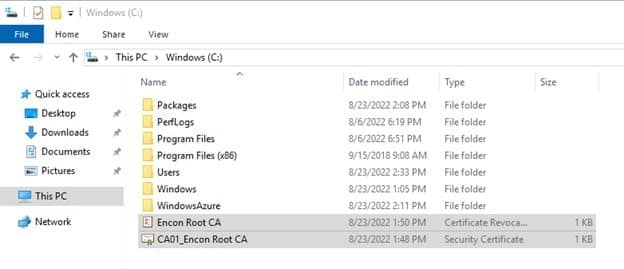
Paste the files into the C drive in CA02
Note: If you are using RDP, you can copy and paste directly
-
On CA02, to publish Encon Root CA Certificate and CRL in Active Directory, run the following commands at an administrative command prompt.
certutil -f -dspublish "C:\CA01_Encon Root CA.crt" RootCA certutil -f -dspublish "C:\Encon Root CA.crl" CA01 -
To add Fabrikam Root CA Certificate and CRL in CA02.Fabrikam.com local store, run the following command from an administrative command prompt.
certutil -addstore -f root "C:\CA01_Encon Root CA.crt" certutil -addstore -f root "C:\Encon Root CA.crl" -
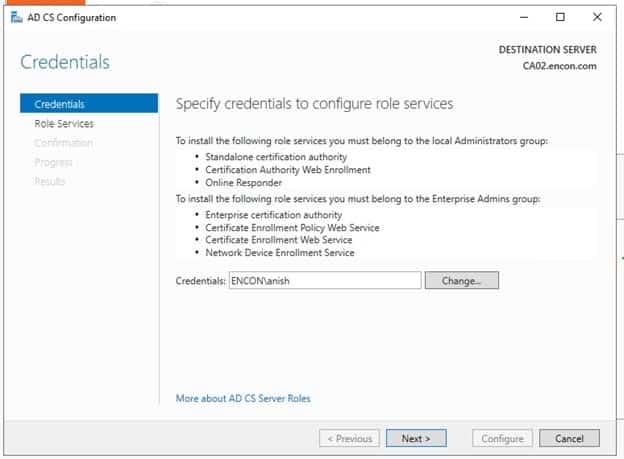
Ensure you are logged in as Encon User in CA02
-
Click Start, and then click Server Manager
-
Click Manage, and then click Add Roles and Features
-
Click Next on Before you Begin
-
On Installation Type, click Next
-
On Server Selection, click Next
-
On Server Roles, choose Active Directory Certificate Services, click on Add Features when prompted and click Next
-
On Features, click Next
-
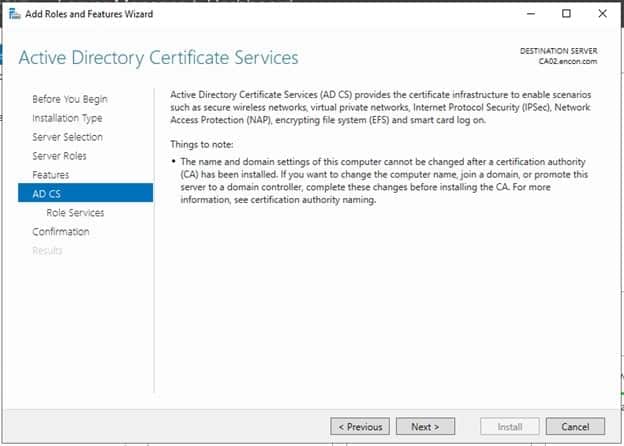
On AD CS, click Next.
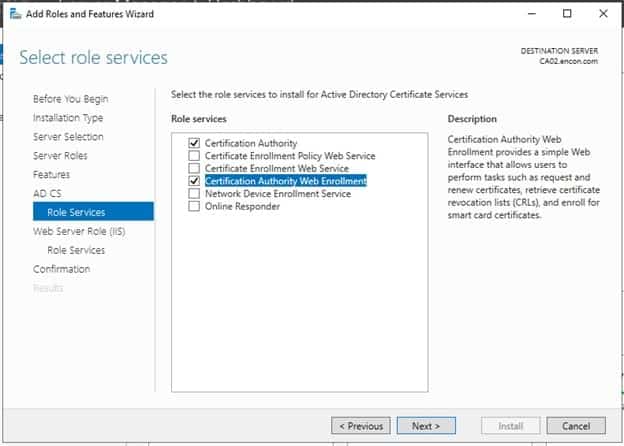
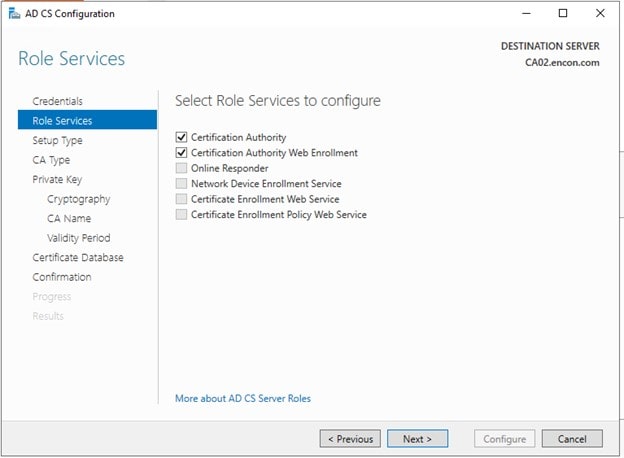
On Role Services, Choose Certificate Authority Web Enrollment, click on Add Features when prompted, and click Next
-
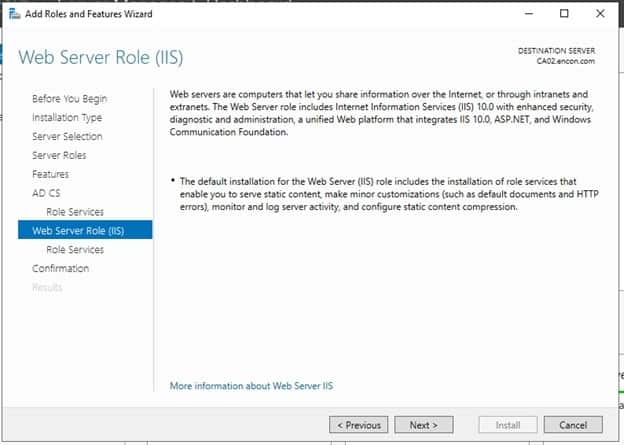
On Web Server Role (IIS) and Role Services, click Next
-
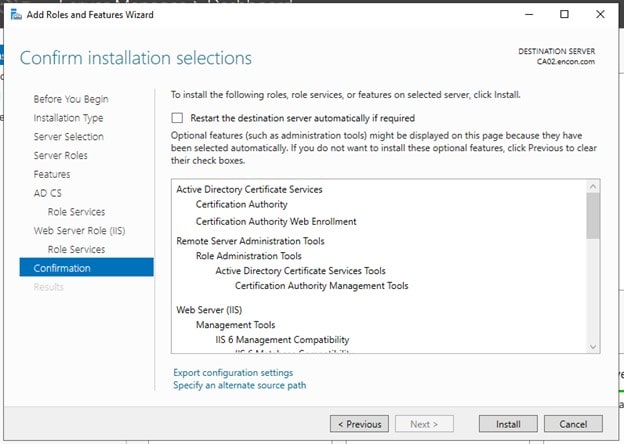
On Confirmation, click Install
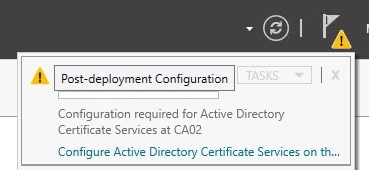
- After installation, either
-
Click on Configure Active Directory Certificate Services on the destination server in Add Roles and Features Wizard
-
Or, click on Configure Active Directory Certificate Services on Notification Center
-
-
On Credentials, click Next
-
Under Role Services, choose both Certificate Authority as well as Certificate Authority Web Enrollment
-
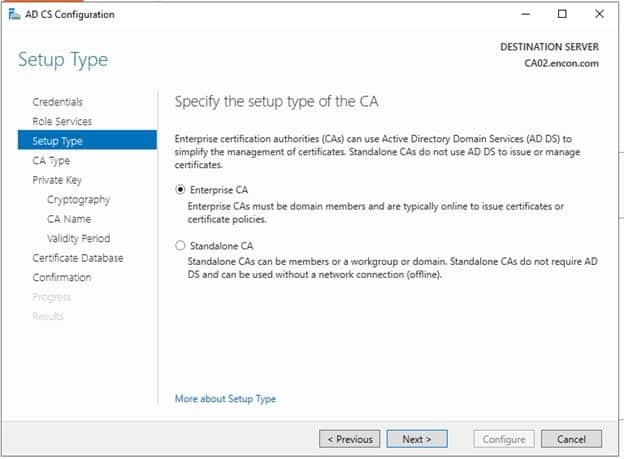
On Setup type, ensure Enterprise CA is chosen and click Next
-
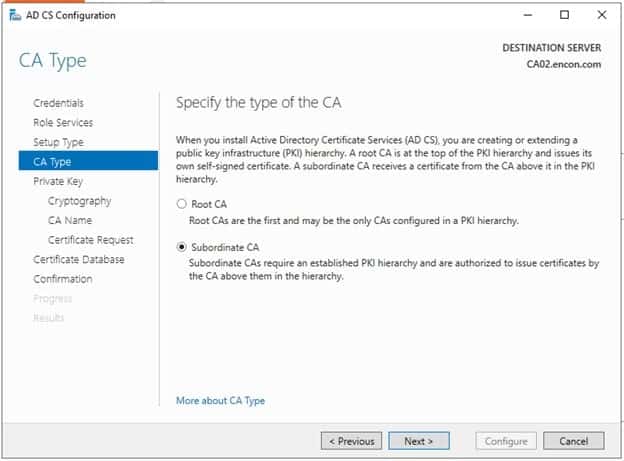
On CA Type, choose Subordinate CA, and click Next
-
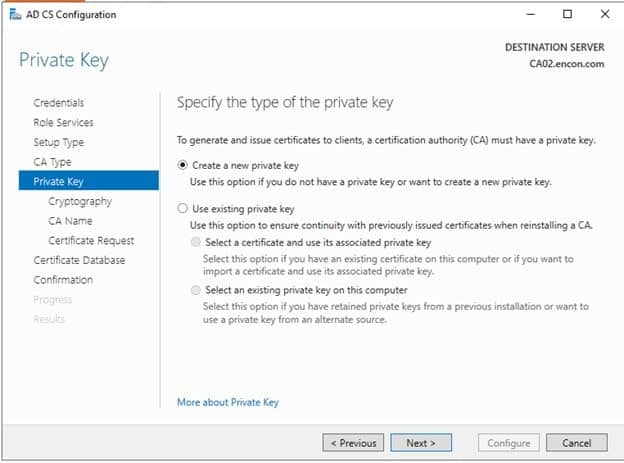
On Private Key, choose to Create a new private key
-
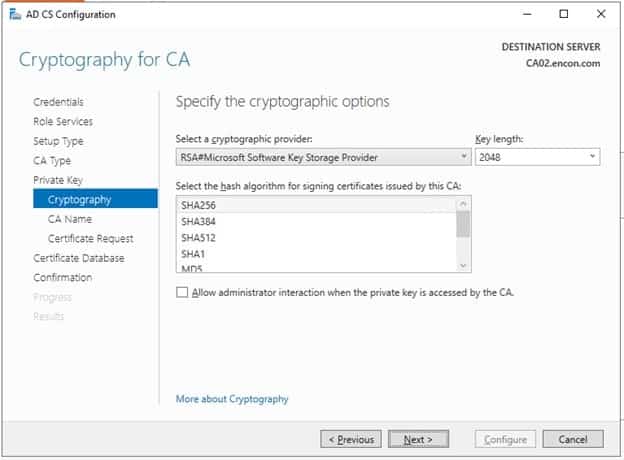
On Cryptography, leave defaults and click Next
-
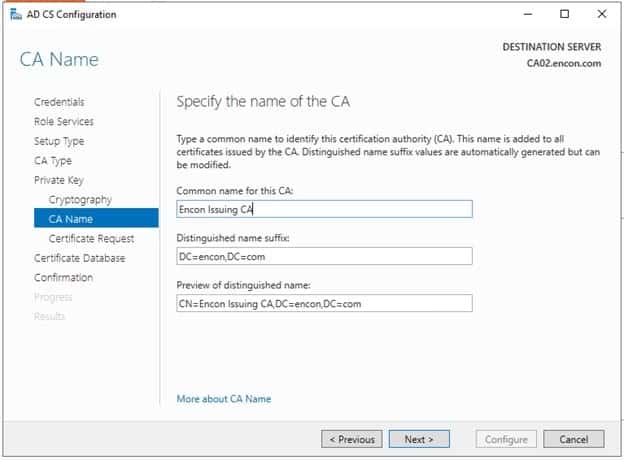
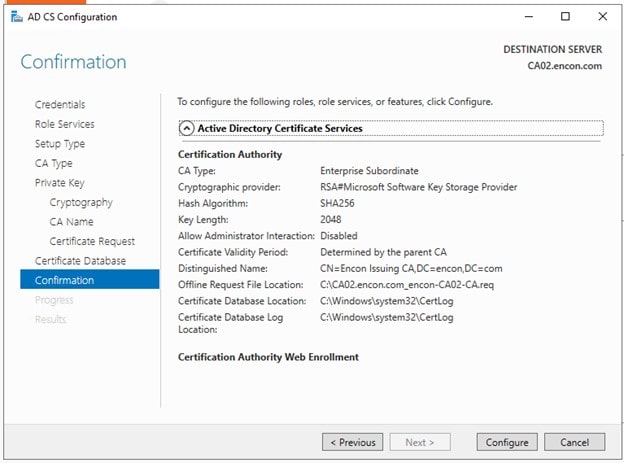
On CA Name, provide Common Name as Encon Issuing CA and leave the everything default value.
-
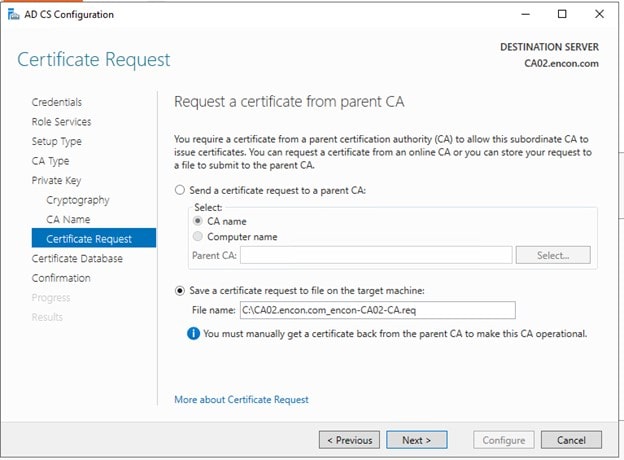
On Certificate Request, ensure Save a certificate request to file is selected and click Next
-
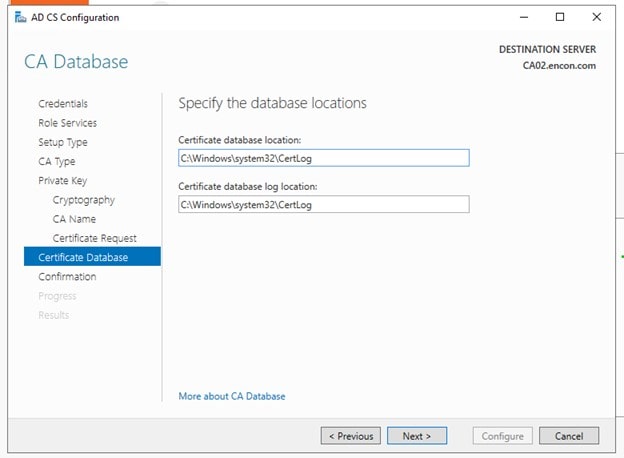
On Certificate Database, click Next
-
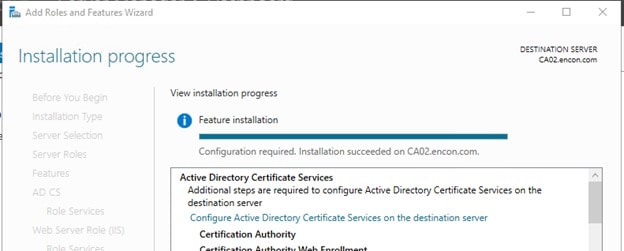
On Confirmation after reviewing, Click Configure
-
Issuing CA should now be configured. Click Close.
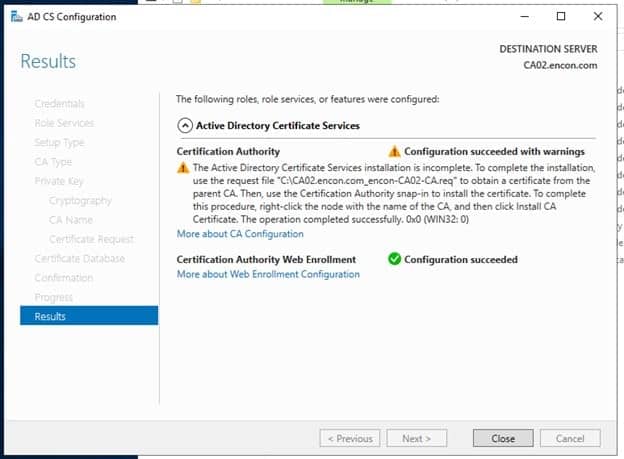
-
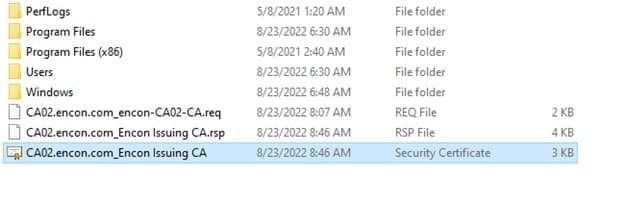
After Issuing CA is configured, a file will appear on the C drive. Copy this file to C drive in Root CA.
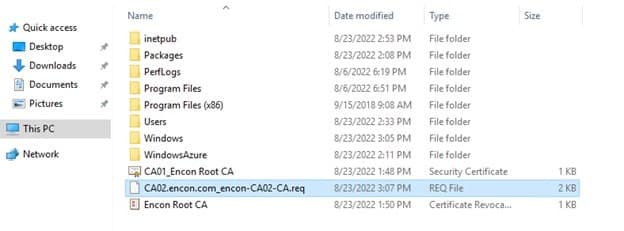
- Copy Issuing CA req file to Root CA C drive
- Open Command Prompt
-
Run the command
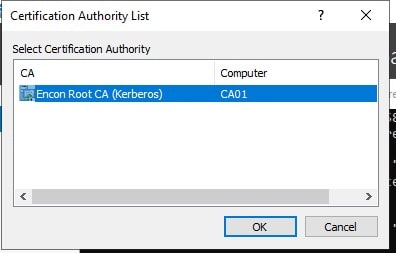
certreq -submit "C:\CA02.encon.com_encon-CA02-CA.req" -
Select Root CA from the Certification Authority List

-
Once a request is submitted, you will get a RequestID

-
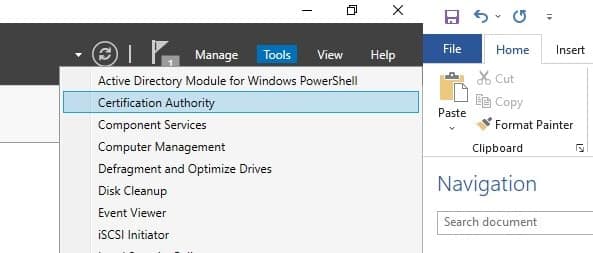
Open Certificate Authority from Tools in Server Manager
-
Navigate to Pending Requests
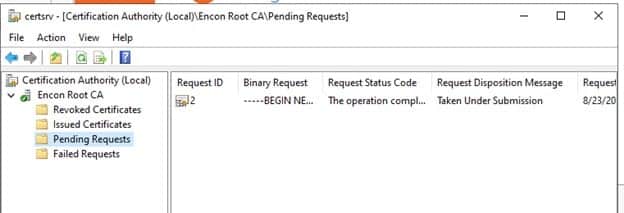
-
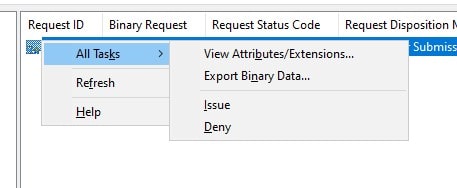
Right Click on the RequestID that you got while submitting the request, click All Tasks, and click Issue
-
Once issued, navigate to the command prompt again, and run
certreq -retrieve 2 "C:\CA02.encon.com_Encon Issuing CA.crt" -
Select Root CA from the Certification Authority List
-
Once retrieved, the successful message is displayed

-
Copy the issued certificate from Root CA to CA02
-
Login to CA02 as an Encon user and copy the certificate to the C drive
-
Open Certificate Authority from Tools in Server Manager

-
Right-click on Encon Issuing CA, click on All Tasks, and click Install CA Certificate
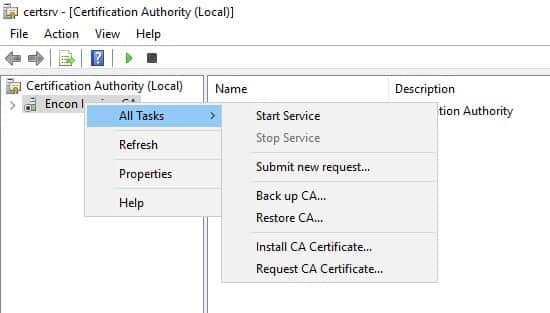
-
Navigate to C drive, and select All files beside File name until the copied certificate is visible
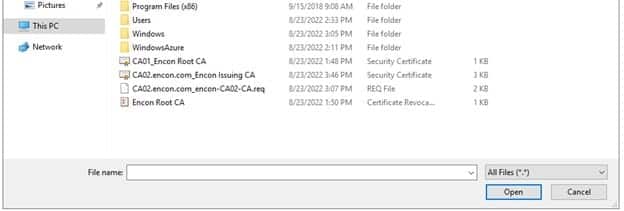
-
Select the issued certificate and click Open
Right-click on Encon Issuing CA, click on All Tasks, and click Start Service

- Ensure that you are logged on to CA02 as Encon User
- Open a command prompt. To do so, you can click Start, click Run, type cmd and then click OK.
To define CRL Period Units and CRL Period, run the following commands from an administrative command prompt:
- Certutil -setreg CA\CRLPeriodUnits 1
- Certutil -setreg CA\CRLPeriod “Weeks”
- Certutil -setreg CA\CRLDeltaPeriodUnits 1
- Certutil -setreg CA\CRLDeltaPeriod “Days”
-
To define CRL Overlap Period Units and CRL Overlap Period, run the following commands from an administrative command prompt:
- Certutil -setreg CA\CRLOverlapPeriodUnits 12
- Certutil -setreg CA\CRLOverlapPeriod “Hours”
-
To define Validity Period Units for all issued certificates by this CA, type the following command and then press Enter. In this lab, the Enterprise Issuing CA should receive a 20-year lifetime for its CA certificate. To configure this, run the following commands from an administrative command prompt:
- Certutil -setreg CA\ValidityPeriodUnits 5
- Certutil -setreg CA\ValidityPeriod “Years”
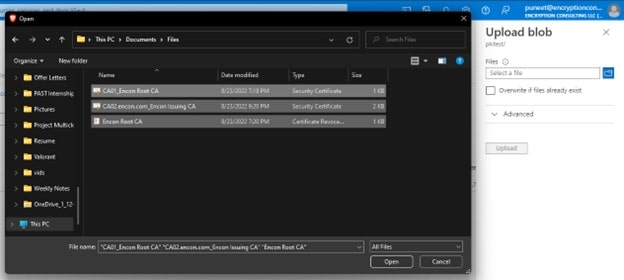
- Root CA certificates
- Root CA CRL
- Issuing CA Certificates
-
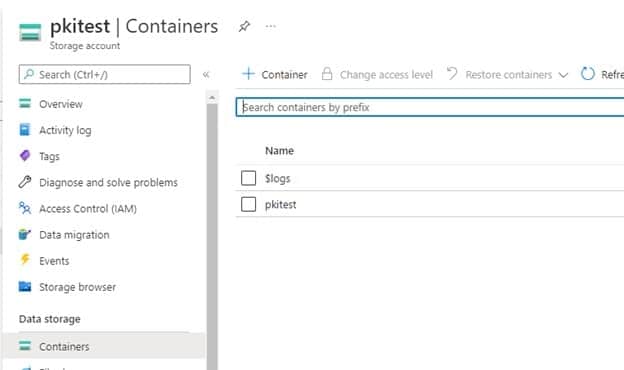
Navigate to the storage account, and click on the pkitest you created
-
Click on Containers under Data Storage

- Click on the pkitest folder
-
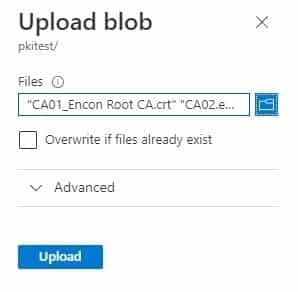
Click on Upload on the top left
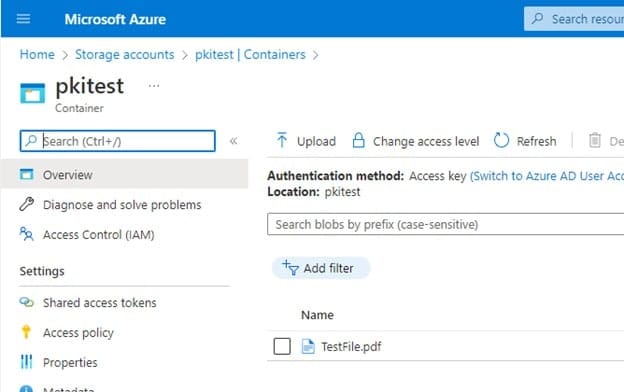
-
Click on the browse icon and select all the files that need to be uploaded and click Open
-
Check to Overwrite if files already exist and then click Upload
-
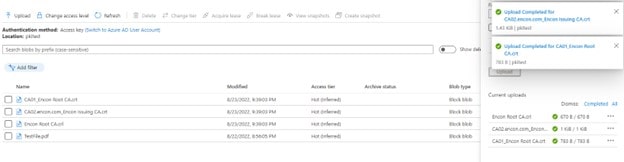
After uploading, all the files should be available
-
Navigate to the storage account, and click on the pkitest you created

-
Click on Containers under Data Storage
- Click on the pkitest folder
-
Click on Shared Access Token under Settings. Provide appropriate permissions, and choose an expiry date (preferably one year)
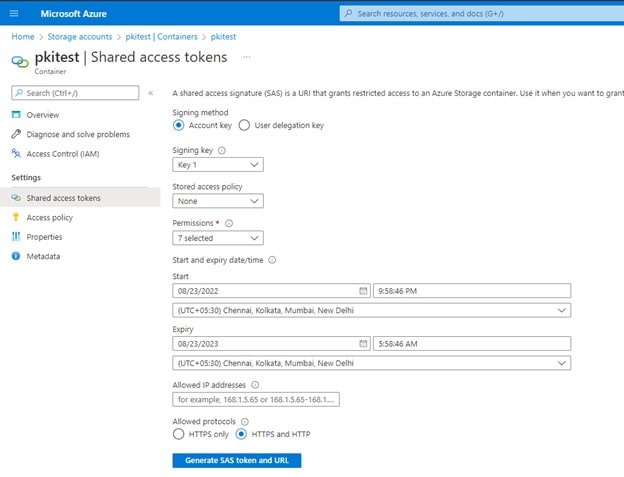
- Click Generate SAS token and copy Blob SAS Token
- Open the code in notepad or your preferred code editor
-
Paste the SAS token for the variable
$azCopyDestinationSASKey
- Navigate to properties under Settings, copy the URL and paste it for $azCopyDestination
- Change log and log archive locations if applicable.
- Change AzCopy location on $azCopyBinaryPath if you stored azcopy in another location.
- Once changes are made, store them in C:\AZCopyCode\Invoke-UpdateAzureBlobPKIStorage.ps1
- Open Powershell in CA02
- Navigate to C:\AZCopyCode
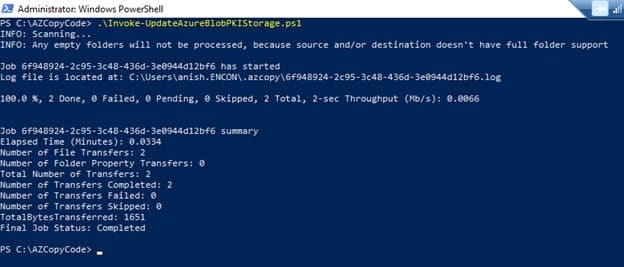
- Run Invoke-UpdateAzureBlobPKIStorage.ps1
-
Once copied, it will show how many files are copied, with 100% and all done with 0 Failed
-
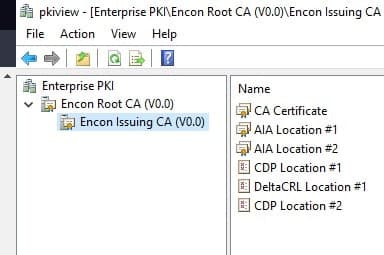
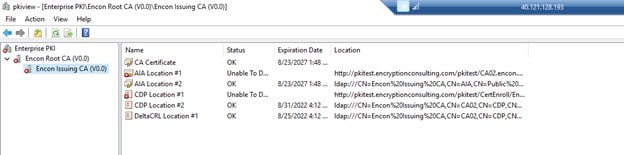
Open PKIView.msc, and now no errors should be visible

-
The overall PKI should be healthy.
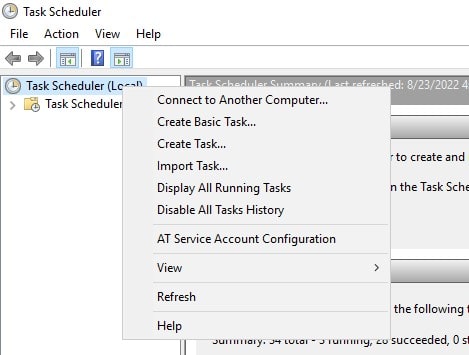
- Open Task Scheduler
-
Left click on Task Scheduler (local) and click on Create a Basic Task
-
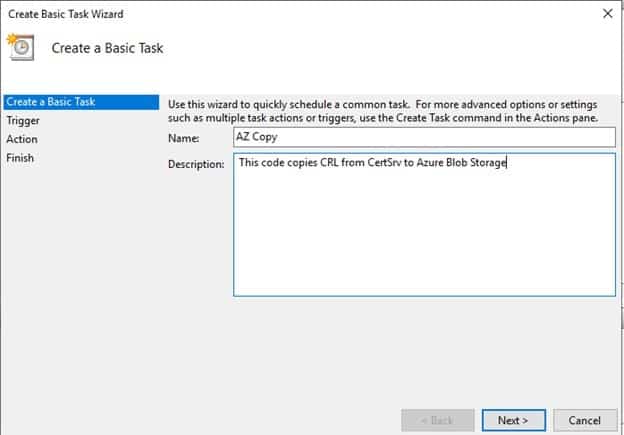
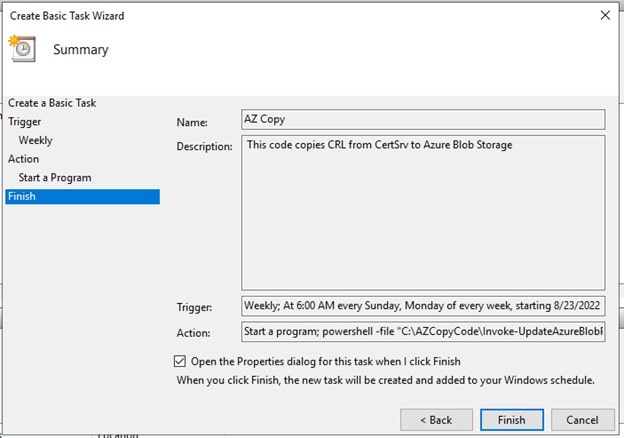
Provide name and description for the Task
-
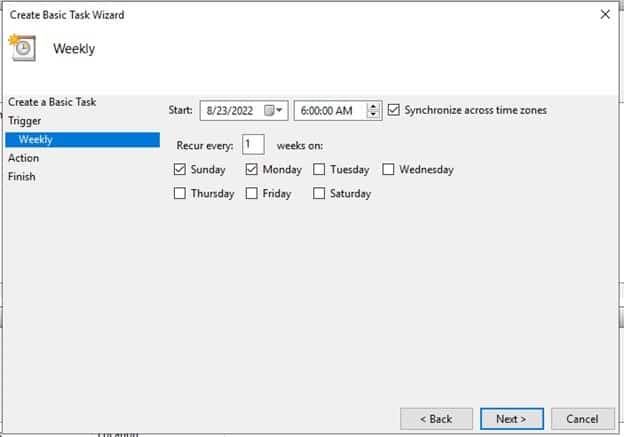
Task Trigger is configured to weekly

-
Select Data and Time when the script will run
-
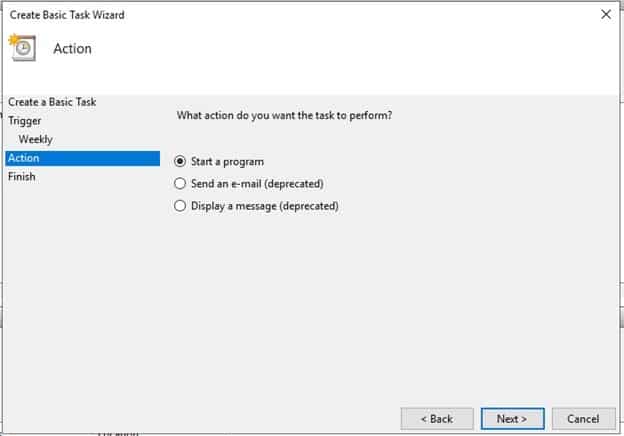
On Action, select Start A program and click Next
-
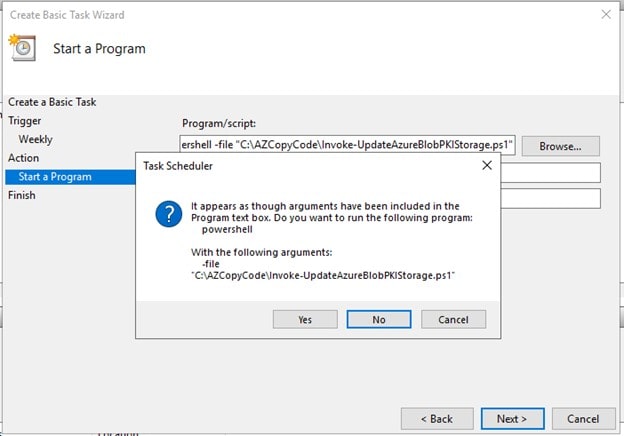
Under Start, a Program, In Program/Script write
powershell -file "C:\AZCopyCode\Invoke-UpdateAzureBlobPKIStorage.ps1"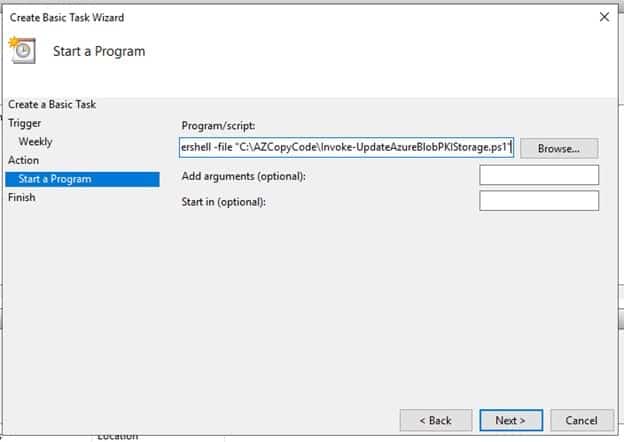
-
Click yes on the prompt
-
Check the Open Properties dialog and click Finish
-
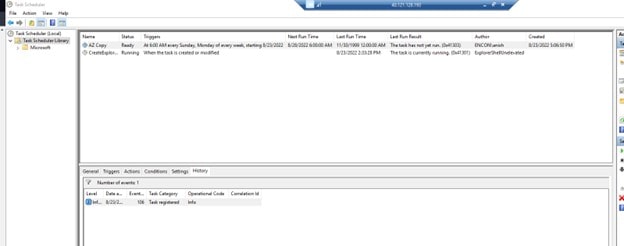
Once completed, AZ Copy should be available in Task Scheduler Library.
-
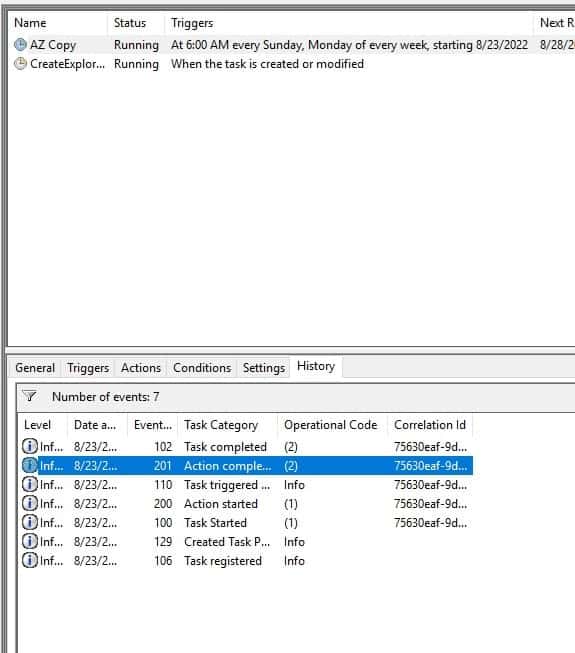
Right Click AZ Copy and click Run
-
Refresh and check History Tab. Action Completed should appear in History
Provide other parameters as per your requirement and create the VM.
Configuring Network
Creating CAPolicy in Issuing CA
Publishing Root CA Certificates and CRLs in CA02
Installing Issuing CA
Configuration of Issuing CA
Issue Encon Issuing CA Certificate
Post Installation Configuration on Issuing CA
Configuration of CDP and AIA points
Multiple methods are configuring the Authority Information Access (AIA) and certificate revocation list distribution point (CDP) locations. The AIA points to the public key for the certification authority (CA). You can use the user interface (in the Properties of the CA object), certutil, or directly edit the registry.
The CDP is where the certificate revocation list is maintained, which allows client computers to determine if a certificate has been revoked. This lab will have three locations for the AIA and three for the CDP.
Configuring AIA points
A certutil command is a quick and common method for configuring the AIA. The certutil command to set the AIA modifies the registry, so ensure that you run the command from a command prompt run as administrator.
When you run the following certutil command, you will be configuring a static file system location, a HTTP location for the AIA, and a lightweight directory access path (LDAP) location. Run the following command:
certutil -setreg CA\CACertPublicationURLs “1:C:\Windows\system32\CertSrv\CertEnroll\%1_%3%4.crt\n2:http://pkitest.encryptionconsulting.com/pkitest/%1_%3%4.crt\n2:ldap:///CN=%7,CN=AIA,CN=Public Key Services,CN=Services,%6%11”
Note: You need to modify the http address on the AIA location. For this scenario, our http container address was http://pkitest.encryptionconsulting.com/pkitest/, which can vary for you.
Configuring the CDP Points
The certutil command to set the CDP modifies the registry, so ensure that you run the command from a command
certutil -setreg CA\CRLPublicationURLs “65:C:\Windows\system32\CertSrv\CertEnroll\%3%8%9.crl\n2:http://pkitest.encryptionconsulting.com/pkitest/CertEnroll/%3%8%9.crl\n79:ldap:///CN=%7%8,CN=%2,CN=CDP,CN=Public Key Services,CN=Services,%6%10”
Note: You need to modify the http address on the CDP location. For this scenario, our http container address was http://pkitest.encryptionconsulting.com/pkitest/, which can vary for you.
Also, as per the CDP point, the CertEnroll folder will exist inside the pkitest container in Azure Blob. This is because the folder will be recursively copied from the CertSrv folder to the blob storage
At an administrative command prompt, run the following commands to restart Active Directory Certificate Services and publish the CRL
net stop certsvc & &net start certsvc
certutil -crl
Uploading Certificates and CRLs to the Blob storage
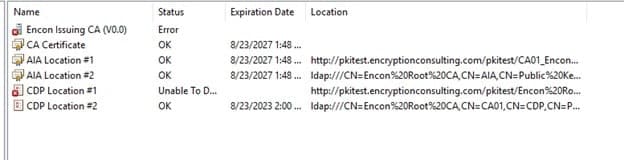
Per our CDP and AIA points, the certificates would be available at the blob storage in Azure. If we run PKIView.msc at Issuing CA, we will run into errors where the certificates or CRLs are not found
To resolve this, we need to upload
Issuing CA CRLs will be uploaded using a script we will run next.
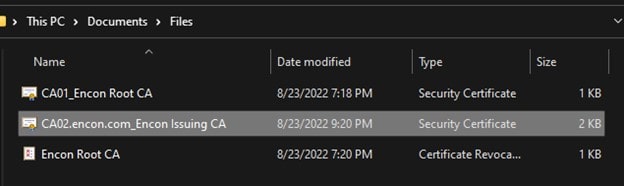
To upload the files, copy them from their respective machines and keep them handy on your host machine. You can find these files at C:\Windows\System32\certsrv\CertEnroll on both Root CA and issuing CA.
Note: Do not copy the CRLs of Issuing CA.
Once copied, follow the steps below
Once the files are uploaded, navigate to CA02 and open PKIView.msc again. Now CDP points of Root and Issuing CA should be available, but the AIA point would still show an error as we didn’t copy those files to the pkitest folder
Script to copy Issuing CA CRLs
Before we begin, we need to download AzCopy. Once downloaded, extract the app into C:\ to be accessible. We will be using this location on our script. Change the script’s path if you intend to store the application in a different location.
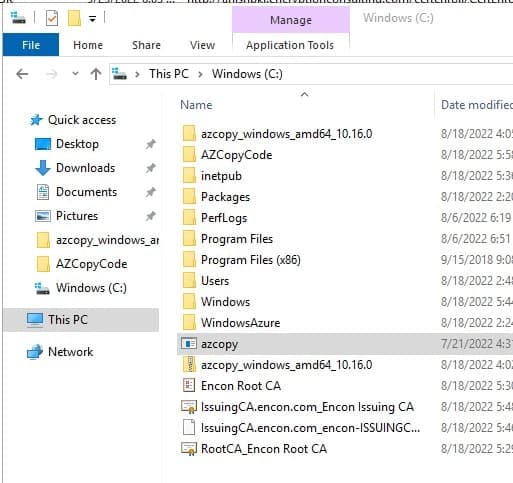
Now you would also need a folder to store the code. I would recommend creating a folder on C drive as AZCopyCode. Download the script from below and store it there. We would need to make some changes to make it work.
Note: This code was initially created by dstreefkerk. As per Windows Server 2022, this code does work. I have made some changes and fixed a few bugs.
Github Gist to be embedded:
<script src=”https://gist.github.com/coffee-coded/4cbeb0de02628bc2da6b182dc11bad0b.js”></script>
Code Changes
Troubleshooting
For this scenario, we suppose you get an error
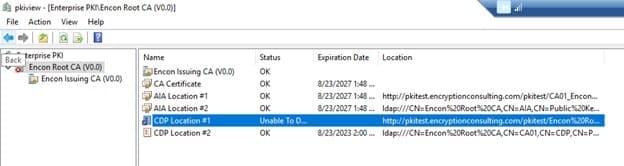
Copy the URL by right-clicking on the location and copying it to a notepad. It should look something like this
http://pkitest.encryptionconsulting.com/pkitest/Encon%20Root%20CA.crl%20
If you try opening this on the browser, it would still give an error as there is a trailing %20 at the end, indicating a space at the end. To resolve this, CDP and AIA points need to be changed on Root CA, and the issuing CA needs to be recreated again.
Automating the script
We would automate this script using Task Scheduler to run this script every week. You can tweak this as per your requirements.
Conclusion
This concludes our AD CS installation with Azure Blob Storage. It is easier to manage, but we also achieve high availability using Azure’s Blob Storage. This will help organizations create PKI that can be operational worldwide with minimal latency and high performance no matter where you are. If you face any issues, do remember to reach out to info@encryptionconsulting.com
- Prerequisites
- Preparing CDP and AIA points
- Mapping a custom domain to Azure Blog Storage
- Disabling secure transfer required
- Testing Accessibility of Storage Account
- Creating Domain Controller
- Configuring Network
- Installing Active Directory Domain Services and Adding a new Forest
- Creating Offline Root CA
- Installing Offline Root CA
- Post Installation Configuration on Root CA
- Configuration of CDP and AIA points
- Creating Issuing CA
- Configuring Network
- Creating CAPolicy in Issuing CA
- Publishing Root CA Certificates and CRLs in CA02
- Installing Issuing CA
- Configuration of Issuing CA
- Issue Encon Issuing CA Certificate
- Post Installation Configuration on Issuing CA
- Configuration of CDP and AIA points
- Configuring AIA points
- Configuring the CDP Points
- Uploading Certificates and CRLs to the Blob storage
- Script to copy Issuing CA CRLs
- Code Changes
- Troubleshooting
- Automating the script
- Conclusion